Water in the house feels scary. It spreads fast and hides well. A busted pipe, a roof leak, or a storm can start it. Costs grow when you wait. Quick action limits the mess and stress.
This guide keeps things plain and useful. You will see what to do, why it matters, and when to call help. I will also touch on how building science explains what you see. That way, choices feel less like guesswork and more like clear steps.
First Hour Game Plan
Stay safe
If water is near outlets, stop. Cut power to that room. Wear rubber shoes. Keep kids and pets out. Use a flashlight, not a lighter. If the breaker panel is wet, stay clear and call an electrician.
Stop the source
Close the main valve or the fixture valve. If you cannot find it, ask a neighbor, your utility, or the plumber on call. Many homes have a curb stop by the street and a second valve where water enters the house.
Document
Take photos and short videos. Show rooms, water lines, baseboards, and the leak point. Place a ruler or a coin near stains so size is clear. This helps later when you talk with your insurer.
Move things
Lift rugs and light furniture. Slide foil or blocks under legs to prevent stains. Unplug devices and move them to dry ground. Place books and papers in boxes and set them aside.
Remove standing water
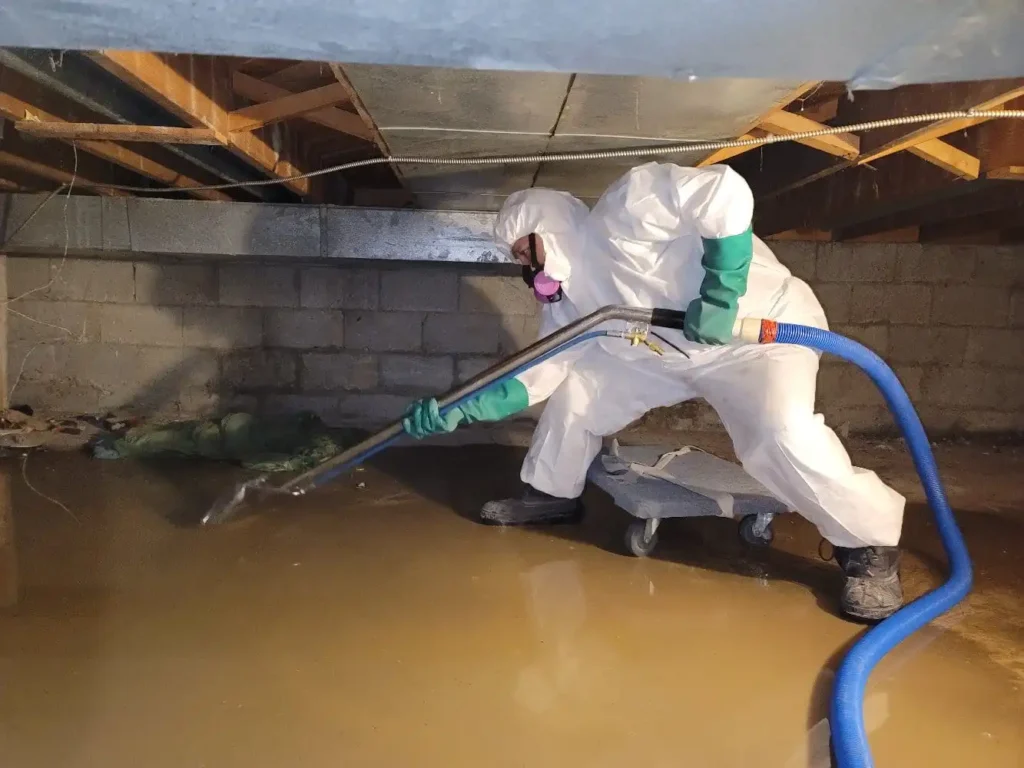
Use a shop vac, mops, and buckets. Work from walls toward the center. Squeegee smooth floors toward a floor drain if you have one. Empty the vac often so suction stays strong.
Start drying
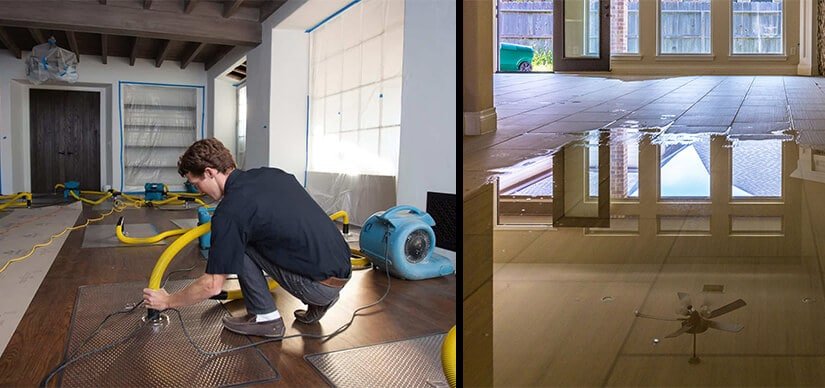
Open windows if the air outside is dry. Run fans and a dehumidifier without breaks. Aim air across wet surfaces, not straight into them. Keep air paths clear so flow reaches corners and closets.
Quick note: Speed helps. Each hour saved now can cut days later.
Why Water Damage Is Worse Than It Looks

Wet wood swells. Drywall softens and sags. Paint blisters. Floors cup. Wiring can corrode. Hidden spaces hold damp air and spores. It may look fine on the surface while the inside stays wet.
Building science helps explain this. Capillary action pulls water into seams and pores. Vapor drive pushes moisture from warm to cool or from high humidity to low. Hygroscopic materials hold water like a sponge. These forces move water behind walls, under floors, and into cabinets. That is why a dry surface can fool you while the cavity stays wet.
There is debate on how much you can dry in place. Some techs argue careful, steady drying can save more finishes than we think. Others prefer early tear out to avoid slow mold growth and hidden odor. The best path depends on three things: how much water you have, where it went, and how long it sat.
A simple way to choose is this. If the water was clean and you started within hours, try drying in place with checks. If the water was dirty or sat for a day or more, plan to remove wet drywall and pads. This is not about fear. It is about time, health, and cost.
Common Home Sources
- Burst or leaking supply lines
- Storm water through doors or windows
- Washer, dishwasher, or water heater failure
- Clogged toilet or sewer backup
- Roof leaks from bad shingles or flashing
- AC condensate line clog that drips into ceilings
- Ice maker line pinhole leaks behind the fridge
Knowing these helps you act fast and choose the right fix. Small drips can do quiet harm. Big breaks do loud harm. Both need quick steps.
Step-by-Step Actions
1) Safety check
If water reached outlets or the panel, kill power to that area. Use the breaker, not the switch on the wall. If you smell gas, leave and call the utility from outside.
2) Shut off water
Close the main valve. It is often near the meter or where the line enters the home. Turn it clockwise. If it is stuck, do not force it and snap it. Call for help.
3) Protect floors
Remove wet rugs and pads. Bag them so they do not add moisture to the room. Lift curtains and drapes so they clear wet floors.
4) Extract
Shop vacs beat towels. Use a wide squeegee on smooth floors. Push water toward a drain. Wring out mops into a bucket, not the sink that might leak more.
5) Open up what you must
Pop baseboards if they are soaked. Open cabinet doors. Pull toe kicks if wet. Drill small holes behind baseboards to vent a wall cavity when the drywall is still sound. Keep holes low and even so patch work is clean later.
6) Set drying
Fans push air across surfaces. Dehumidifiers pull water from air. Keep indoor humidity under fifty percent. Place one fan per small room at least. Point air so streams meet and sweep the space.
7) Monitor
Touch is not a test. A low cost pin meter gives better reads. Pros map moisture each day and write numbers down. You can do the same with a simple chart. Track readings at the same spots each day.
8) Clean surfaces
After extraction, wipe hard floors with mild soap. Do not soak them again. Rinse rags often and change water as it gets dirty.
9) Control odor
Remove wet textiles from the room. Keep air moving. Do not mask smells with strong scents. Odor should fade as materials dry.
10) Watch ceilings
Sagging drywall can fall. Poke a small drain hole if a ceiling bulges with water. Place a bucket under it. Wear eye protection and stand to the side.
DIY Gear vs Pro Gear
Small spills dry with box fans and time. Larger losses act differently. Pros bring high output air movers, LGR or desiccant dehumidifiers, and wall cavity tools. They use moisture meters and thermal cameras to find wet zones you cannot see. Many follow the IICRC S500 guide for drying. You may not need all that. You might when walls, subfloors, or insulation got wet.
There is an old debate on carpet salvage. Some save carpet from clean water if pads are replaced. Others remove both to avoid odor and slow dry times. Age, soil load, and time wet matter. Glue down carpet behaves unlike tacked carpet. Wood subfloors also change the call.
If you choose DIY for a medium loss, set a plan. Extract first, then air flow, then dehumidify. Check daily. If numbers stall for two days, call a pro and ask for a scope. That call may save a whole wall from later mold work.
Mold: The 24 Hour Clock
Mold can start within a day. Warm rooms move faster. You may smell it before you see it. A sweet, earthy note is common. Some people do not smell it at all, so use your eyes and meter too.
Keep air moving and run a dehumidifier for days. Aim for steady dry air, not gusts. If you see fuzzy spots or smell a musty note, pause. Do not scrub dry spores. Call a mold pro. Tape off the room if you can, and limit traffic.
Public health groups share simple rules here. Limit dust. Wear a mask when near wet drywall. Bag debris tight. Vent air outside if you sand or cut. The CDC and the EPA both publish clear home guides that match these steps.
When To Call a Restoration Company

- Water soaked drywall, subfloor, or more than one room
- You cannot find or stop the source
- Odor or visible mold is present
- The water came from sewer or flood water
- You lack enough fans and a strong dehumidifier
Fast response can spare studs and trim. Slow response often means tear out and long repairs. A good crew will extract, dry cavities, test moisture, and plan repairs. Many will help with claim notes as well. The right team also sets a daily check plan and adjusts gear when readings stall.
If you are in Houston, Dallas Water Restoration Pros can help at any hour. They bring trained techs and strong gear. They can also speak with your adjuster and explain the scope.
Insurance Tips
Call your carrier early. Ask about preferred vendors and next steps. Do not toss items before the adjuster signs off. If you must, keep photos and serial numbers.
Track what you do. Keep receipts for fans, bags, cleaners, and bins. A short log helps when you file the claim. Write dates, times, and who you spoke with. Save texts and emails in one folder.
Be ready to explain the source. Say if the water was clean supply, appliance leak, roof leak, or flood water. Policy terms often hinge on the cause. Flood water needs a separate flood policy.
Prevent Water Problems Long Term
Plumbing
Check supply lines and valves twice a year. Look for corrosion and drips. Swap rubber hoses for braided lines on washers and ice makers.
Smart sensors
Install leak alarms near the washer, water heater, and sinks. Some can shut the main valve. Test the alarms each season.
Roof and gutters
Clear leaves. Fix loose shingles. Flashing should sit tight. Make sure downspouts push water six to ten feet from the house. Add splash blocks if soil erodes.
Basements
Grade soil away from the walls. Add a sump pump with a battery backup. Test it before storms. Keep a spare pump on a shelf if you flood often.
HVAC
Keep drain lines clear. A clogged condensate line can wet ceilings fast. Flush the line with vinegar at the start of each summer.
Windows and doors
Check seals. Replace cracked caulk. Water loves small gaps. A quick bead today beats a warped frame next month.
Outdoor care
Aim sprinklers away from siding. Store hoses on racks so fittings do not crack. Trim plants so air can reach walls and dry them after rain.
A Short, Real Story
“Why is the hallway spongy?” my neighbor asked. We pulled back the carpet and found a slow leak from the ice maker line. It had likely dripped for weeks. Fans helped, but the pad had to go. A tech mapped the wet spots and set a big dehumidifier. Three days later, the subfloor was back in range. Small fix. Big save.
On the flip side, I once saw a ceiling stain that looked minor. We poked a test hole and a stream poured out. A roof nail had missed the rafter and left a path. The living room stayed dry at first, so they waited. By day three the drywall bowed. We drained it, cut out a strip, dried the cavity, and patched the roof. That wait added a week of work. Not a horror story. Still, a clear case for early checks.
Stories like these show a theme. Small leaks do quiet harm. Routine checks catch them. Good habits beat hero moves later.
Sample Dry Out Timeline
- 0 to 24 hours: Extract, set fans and dehumidifiers, remove wet pads and trim. Open safe cavities.
- 24 to 72 hours: Cavity drying and daily checks. Adjust gear as readings drop. Aim for steady progress.
- 3 to 7 days: Materials near dry goals. Plan repairs or light rebuild. Paint may wait a bit longer.
- 1 to 4 weeks: Repairs. Scope varies by room count and finish level. Cabinets and floors take longer.
Each house is different. Materials, weather, and water source change the path. A slab home dries unlike a crawlspace home. Old plaster walls act unlike new drywall. Know your home type and adjust.
Field Terms in Plain Words
Category 1 water means clean supply water. Category 2 means gray water from a washer or bath. Category 3 means sewer or flood water. The higher the number, the more care you need.
Air mover is a high speed fan. LGR is a type of strong dehumidifier. Desiccant is a different type that works well in cold air. A perm rating tells how easily vapor passes through a layer. Low perm layers slow drying from one side.
These terms help you follow the plan your crew suggests. They also help you ask better questions and avoid guesswork.
FAQs
How fast should I act?
Right away. Early action saves money and time. Waiting lets water spread and soak deeper.
Can I handle this alone?
You can handle small spills. Get help for wet walls, subfloors, or more than one room. Ask for a scope even if you want to do the labor.
Will insurance cover it?
Sudden pipe breaks are often covered. Flood water needs a separate flood policy. Wear and tear leaks may not be covered.
How long does drying take?
Minor events take a few days. Bigger losses can take weeks, mostly due to rebuild steps.
How do I prevent mold?
Dry fast, keep humidity low, and fix leaks as soon as they appear. Toss soaked pads that sat for days.
Final Word
Water damage is a pain. It can be fixed. Act fast, keep records, and do not guess at hidden damp spots. When in doubt, bring in a pro. If you are in Houston, Dallas Water Restoration Pros is ready to help any time. They will extract, dry, check, and guide you through the next steps. You will sleep better once the numbers show you are back to dry.

